Monday, March 31, 2014

NPQ 31 days Challenge


Hello everyone,

tomorrow some of our members are starting the 31 Days Challenge after +Mary Daniel suggested she wanted to try it out. We are a community and that's how tight groups work, we help each other in our crazy times. And how crazy is that going to be? 1 manicure per day for 31 days! 

That's nothing compared to +Margriet Sijperda Year of nail art in 2013 mind you :)
It's going to be challenging, yes, but also a lot of fun! 

The mods too are going to participate: +Fabiana N and +Magali Neuville-Bisceglia will be doing it along the other members.

So if you are willing to join the madness, hop in!


PS: On the blog, we will showcase daily the manis of the mods, and once in a while we will showcase a glimpse of what is seen in the community. (It will most likely be one day delayed as we have time zones differences)

If you want to give it a try, join us HERE.

Sunday, March 30, 2014

NPQ members 31DC

If you are a member of our community and you are entering the 31 days challenge please add your blog link below.


Saturday, March 29, 2014

Mags Nail Art Party

Inspired by our NPQ members that have done it in the past, I organized a nail art party today where i taught my friends to do dots. Some never wear polish and some did, but no one ever did nail art, an they all gave it a try and did a great job i might add.
It was fun converting them into the dark side mwahaha


It was a very fun experience and we are already programming our second party :)
Here are the pictures of that nice moment:

I displayed my polishes by color to help the ladies pick easily.
Had the toppers on a different display to not add to the confusion of picking a polish 
The big table for them to work on, and my nail station in case they needed any fixing or help
I made cake pops and other food on sticks for easy grabbing while polish might still be wet

Preparing the glasses, margaritas here we come!!


They were all concentrated on their masterpiece
White chocolate cake pops..a delish btw
Home made Macarons (salted butter caramel and rasberry) Thanks daddy!! :)
Mihaela colorful nails and her first go at dots

Laurence's nails and her first time at dots

Marianne's nails, (i did help her out for most of the dots :))

Patricia's first try at dots and that's her dominant hand!!
Polish power!!


Thanks for reading, I hope I inspired you to organize one too if you have friends that more or less interested in nail art , or just to spend a good time! 
I would like to thank +Fia Kilbourn and +Tanya Grala for the inspiration and idea! <3

Mags


Friday, March 28, 2014

NPQ Challenge - Burberry/Tartan - Showcase

Last week the NPQ weekly challenge was Burberry/Tartan nails. We had a lot of entries as usual and so many pretty manis, here is a selection of what could be seen on NPQ:

+Elie Corzo Anarchy Nails

+Deinitisa Amarawi Argyle nails

+Margriet Sijperda Spring Argyle nails

+Mary Daniel Tweed nails

+Tara Howe Blue Burberry nails

+Tamika B. Burberry nails
+Keely Gallagher Family Tartan nails
+Katolin O Argyle nails

+Fabiana N Tartan nails
+Sarah Short Tartan nails

+Magali Neuville-Bisceglia Burberry nails

This week in NPQ we are welcoming spring and painting butterflies on our nails, come join us and share your creations! 

Thursday, March 20, 2014

NPQ Challenge - All Saints - Showcase

Last we we all celebrated Saint Patrick but on NPQ we took the occasion to open up to all Saints. And we've seen very interesting manis, here are a selected few:


+milena pencheva Saint Cyril and Methodius

+Keely Gallagher The Saint 

+Karen Sulkowski Saint Patrick

+StyleThose Nails Saint Patrick

+Margriet Sijperda Saint Patrick

+Lani Maverick Saint Patrick

+Katolin O Saint Patrick

+Jessica Guilbe Saint Patrick

+Magali Neuville-Bisceglia Saint Joan of Arc

+Fabiana N Saint Mary


This week on NPQ we design fabric pattern: Burberry, Argyle/tartan.. so wrap your nails in your favorite fabric and join the fun HERE

Tuesday, March 18, 2014

NPQ Tips - Nail Foil Guide


What you will need:

- NAIL ADHESIVE: This is applied to the nail to transfer the nail foil. The most recommended is Best Glue Ever from Scraperfect. Some foil kits come with its own glue, additionally if you buy nail foil from Dollarnailart.com the foil sometimes comes with glue. These work fine as well. There is also the option of applying the nail foil to tacky nail polish.

http://www.nikcoll.com/images/250/foiladh.jpg


 - NAIL FOIL: They commonly come in small rolls and are very delicate so be careful when you pick them up. They come in a huge variety of colors and the holographic designs are out of this world! They also come opaque, meaning you can't see through the foil, and sometimes sheer, meaning that your base color with show through.

Some companies that sell them are Bundle Monster and Dollarnailart.com (with a USD 25 minimum, but they have so much stuff it's worth it). You can also find them on BornPrettyStore or any other nail art shops.

There are also kits available from Color Club and Ciaté (and others) that come with a base color, foils and adhesive.  


- FLAT BRUSH: To apply the glue you will need a small flat brush. This makes it easier though some of the glue bottles come with their own brushes. Avoid using those because they can be too soft for most of what will do.


- TOP COAT:  Consider your choice of top coat even before you start as this will determine the finished look of your nail foil art. Choosing the right top is extremely important because of "antiquing". This is the reaction of the nail foil with top coat usually resulting in wrinkling and losing the brilliant holographic effect in the nail foil designs. Most top coats cause this effect, but some less so than others.

What you definitely do not want is a FAST DRY TOP COAT. This is a flat NO. You will see the nail foil shrink before your eyes.

Of the readily available NON-FAST DRY TOP COATS, Sally Hansen Hard as Nails does a good job. The antiquing still happens but it is far less obvious.

You can also choose to go without a top coat. This obviously is not meant to last long, but it is the only sure way to retain the full beauty of the nail foil and looks amazing when you do full nails.

The more exotic options include the following:

* WATER-BASED TOP COAT. No antiquing with this option. The one from Suncoat is decent.

* CLEAR GEL COAT: Also no antiquing. A coat of clear gel works marvelously but the issue with this is that you are putting the gel over glue. Don't expect that the coat will have the same lasting effect if you do foil on the whole nail. This may work much better when you are just doing nail foil accents. And obviously you have to keep in mind the removal process for gel polishes.

* CRAFT VARNISH: No antiquing. This seems to be a well-known option. Using a water-based craft varnish, mixed with water to thin it down. The consensus is that this works very well.

So there are your top coat options. Choose wisely! (Fast-dry top coat is a poor choice!)


The Technique

Unlike a lot of nail art where speed is of the essence, nail foil is an easy form of nail art. You can relax into it and take your time. The problem comes with the "finish" (read: top coat). The instructions below assume you are using glue. If you are going to use nail foil with tacky polish, you can use the same method, just skip step 2 and make sure your polish is tacky going into Step 3 (You will want to take care not to ruin the base color).

- STEP 1. You prepare your nails with your usual base coat and your choice of base color. The options are obviously only limited by your nail polish stash, you can go complimentary or contrasting depending on the effect you want. You can also just have a base coat. A complimentary color is often used if you are doing a full nail. This is because when you apply the foil you cannot fully prevent small bald spots and a complimentary color will successfully disguise the bald spots

You can do a full nail or just use the foil to create highlights. I would NOT recommend very thin strips of foil for nail designs if you know that your top coat will cause antiquing.

- STEP 2. Continue with this step once your base coat/color is completely dry. Apply a very thin coat of nail glue with your flat brush where you want the foil. It is important that the coat of glue is very thin because too much glue will cause some antiquing as the glue dries even before you apply the top coat. Second, you want it to be as smooth as possible because every ridge in the glue will show in the foil. You want to allow the glue to dry for a minute or at least until it turns clear. (With the Best Glue Ever that is about 30 seconds or as long as it takes to apply the glue from the pinky to the thumb)

- STEP 3. Cut a piece of foil big enough to easily cover your nail.

- STEP 4. Now make sure that you have the side of the foil with the design toward your nail and run you're your finger over the nail (or you can use a Qtip) making sure that the foil has adhered to your nail including the sides. You do want to put too much pressure; just enough to make sure that the foil is in contact with the glue.

- STEP 5. When you are sure that the foil is in place, gently pull on the edge. The foil should be left behind on your nail and you should have something that looks like a clear cutout on the foil sheet. Sometimes the foil does not stick and you can just go back and apply a bit of foil to that spot, but it can also be that that the glue has dried completely. You would have to reapply glue if you really want to cover up a glaring bald spot. The better option, as mentioned earlier, is to use a complimentary base color to hide the spots.

That's it!


Here is a video extremely helpful and it is probably the only video you need for the basics:
Basic Intro to Foils - Nail Tutorial by Miss80Million


Photo Credit: +Fabiana N 

Monday, March 17, 2014

NPQ Meet-up - Sarah and Keely go shopping

On Saturday March 15th 2014, +Sarah Short and +Keely Gallagher met up for the first time and decided (like any NPQueen would) to go polish shopping. This is the first time NPQ brought people together in real life and it is so nice to see that our community is spawning friendship all over the world.

Without further ado let's hear the story of their meeting told by Keely:


"It was so much fun. We found each other and had a look at each other's manis. After we checked out Boots and Poundland, I showed Sarah all the places to find the good nail polish in TK Maxx which is where I found some Seche Base for £4 and convinced to till assistant to get the bottle of SV that was on the shelf with it (she put it aside for herself). Sarah showed me the 2True polishes she loves for stamping and we found gorgeous flakies in Urban Outfitters where Sarah nabbed a grey-black holo that looks to be a near dupe for Color Club Beyond for less than half the price it should have been."

The damages are done and boy do a NPQueen knows how to shop, but 2 together, watch out!

"We both got Revlon Gold Coast (a sheer gold shimmer), WIP Mermaid (pale turquoise flakie) and the Revlon double ended brush for cleanup that Mary Daniel recommended. I also chose WIP Angel Dust (pale pink flakie), Chit Chat Rio (multi coloured glitter), 2True Metallica Arete (pale green foil) and the Seche Base."

More goodies for our Queens

"It was so great polish shopping who totally speaks the same language - we spotted dupes and reviewed brush quality. I showed Sarah my Dropbox full of mani photos and we chose my Throwback for next week featuring a polish Sarah bought in Boots. "


Then they had an obligatory pit-stop at a café to chit chat some more and admire their new treasures. People were looking at them weird for having so many polishes and swatching it like that in a café, gotta be an NPQueens to just don't care!


The pretty Keely at the café

"Over chocolate cake we checked out our hauls and swatched the flakies which turned out to be very similar to Essie Shine of the Times / Sally Hansen Hidden Treasure over the dark base Sarah had on. We were getting a few looks but didn't care!"

Sarah's massive haul of 21 polishes


That looked like a perfectly nice afternoon and definitely want us to meet more NPQueens!! 

Saturday, March 15, 2014

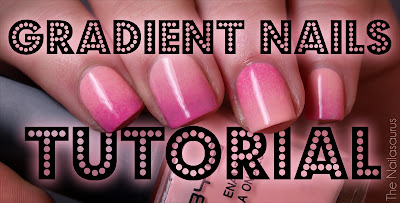
NPQ Tips - How to do Gradient Nails


Gradient nails are beautiful, easy to do and can be effective on their own or a great base for stamping, stickers or any kind of free hand designs.

It does require a certain amount of cleaning but it's so worth it.

Photo credit: +Mary Daniel 

The most common technique used is sponging. Using any kind of sponge (make-up sponge are the best though) you will easily achieve a perfect gradient finish.

- Prepare your nails and paint them in the lightest of the color you will use for the gradient
- Let dry completely.
- Apply the colors of your gradient on a sponge and dab it on the nail. 
- Wait for it to dry and repeat until you achieve the depth of color desired.
- Clean up
- Add top coat to smooth it all and blend everything nicely and you're done!

Here is a tutorial by the Nailasaurus: 
Gradient Nail Art Tutorial


If you ever want to try or want to check different ways to make gradients, here is an awesome YouTube video by Meliney that will teach you all that:

Photo Credit: +Sarah Short 


Additional tips & tricks:


- Try to hold your sponge parallel with the nails and sponge in an up and down motion.

- This look works better with colors that compliment each other or that are close to each other (orange/yellow for example).
- Always apply top coat to smooth the gradient and achieve the perfect blend.
- You can ease of the cleaning process by taping your finger like you would before watermarble.


If you like those technical guides, tips  tricks feel free to request more of them on any technique you would like to master, we will happily create one for you!